
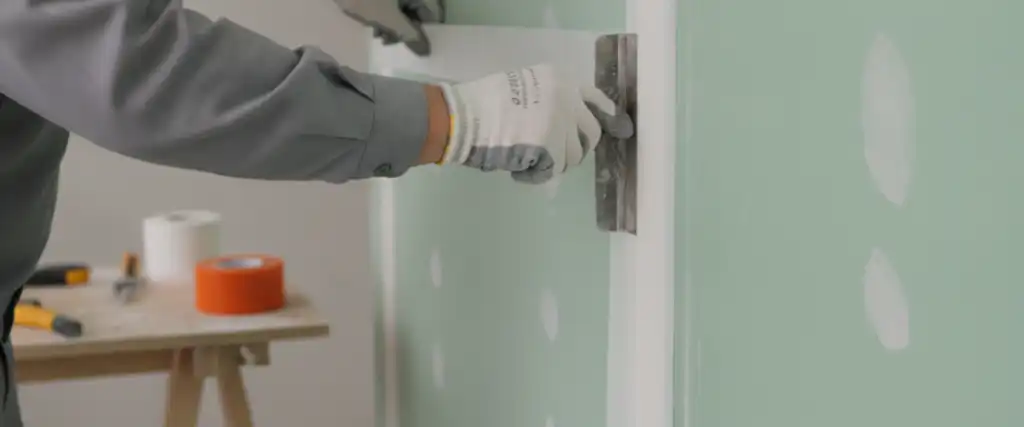
Choosing the best drywall tape for plasterboard joints is a critical decision that impacts the durability and finish of any interior plastering project. Whether you’re undertaking a minor repair or a complete home renovation, selecting the correct tape type helps achieve a seamless, crack-resistant surface that stands the test of time. This guide from Empire Interior Plastering will explore the key differences between paper and fibreglass mesh tape, helping you understand their strengths, limitations, and optimal applications for a professional finish.
Key Takeaways
- Paper tape offers superior strength and crack resistance, ideal for flat joints and internal corners, but requires careful mud embedment.
- Fibreglass mesh tape is self-adhesive and easier to apply, making it suitable for repairs and curved surfaces, though it offers less tensile strength.
- For wet areas like bathrooms, paper tape embedded in a setting-type compound provides better moisture resistance and durability.
- Professional taping by experts like Empire Interior Plastering helps deliver long-term joint integrity and a high-quality finish, especially for complex projects.
- The choice between paper and mesh tape depends on joint type, environmental conditions, and the desired level of crack prevention.
What Is Drywall Tape and Why It Matters
Drywall tape, often called plasterboard tape in Australia, is an essential material used to reinforce the joints between plasterboard sheets. Without it, the dried joint compound (or mud) would eventually crack due to structural movement, humidity changes, and general wear and tear. Taping creates a strong, continuous surface that can withstand these stresses, ensuring a smooth and durable finish ready for painting or wallpapering.
The primary purpose of drywall tape is to prevent cracks from forming along the seams where two plasterboard sheets meet. Plasterboard sheets, such as those from CSR Gyprock or Knauf, have either tapered edges or square (butt) joints. Tapered edges are designed to accommodate joint compound and tape, creating a flush surface. Butt joints, however, require more skill to feather the compound smoothly without creating a noticeable bulge.
Beyond crack prevention, tape also contributes to the overall structural integrity of the wall or ceiling. It helps to unify the individual plasterboard sheets into a single, robust surface. This is particularly important for areas that experience movement or stress, such as around door frames or in high-traffic zones. Using the correct drywall tape and application technique for plasterboard joints is fundamental to achieving a professional, long-lasting plasterboard finish.
Paper Tape vs Fibreglass Mesh Tape Comparison
When it comes to reinforcing plasterboard joints, the two primary contenders are paper tape and fibreglass mesh tape. Each has distinct properties, making them suitable for different applications and skill levels. Understanding these differences is key to making an informed choice for your project.
Paper Drywall Tape for Plasterboard Joints
Properties: Paper tape is a strong, non-adhesive paper strip, typically perforated along its length to allow joint compound to penetrate and bond effectively. It comes in rolls and requires embedding into a layer of wet joint compound.
- Strengths:
- Superior Crack Resistance: Its non-elastic nature provides excellent tensile strength, making it highly resistant to cracking, especially on flat joints and internal corners. This is crucial for areas requiring a robust, long-lasting finish.
- Strong Bond: When properly embedded, the paper fibres combine with the joint compound to form a very strong, monolithic bond.
- Ideal for Internal Corners: The crease down the centre of paper tape allows it to be folded neatly into internal corners, creating crisp, straight lines.
- Cost-Effective: Generally more affordable than mesh tape.
- Limitations:
- Application Difficulty: Requires skill and practice to embed smoothly without bubbles or wrinkles. The mud must be applied evenly, the tape pressed firmly, and excess compound removed carefully.
- Less Forgiving: Mistakes during application can lead to visible imperfections or weak points if not corrected immediately.
- Drying Time: Requires the initial layer of compound to dry completely before subsequent coats can be applied.
- Best Applications: Flat joints (tapered edges and butt joints), internal corners, new construction, and high-stress areas where maximum crack resistance is paramount.
Fibreglass Mesh Tape
Properties: Fibreglass mesh tape is a self-adhesive, open-weave mesh made from fibreglass threads. Its adhesive backing allows for easy positioning before applying joint compound.
- Strengths:
- Ease of Use: The self-adhesive backing makes it much simpler and faster to apply, especially for DIY enthusiasts. It adheres directly to the plasterboard, holding itself in place.
- Faster Application: No need to embed in a wet layer of mud first, saving a step in the process. Compound can be applied directly over the tape.
- Ideal for Repairs: Excellent for patching holes or repairing existing cracks, as it adds immediate reinforcement without needing a fresh layer of mud to hold it.
- Mould Resistance: Fibreglass itself is naturally mould-resistant, making it a good choice for some environments.
- Limitations:
- Lower Tensile Strength: The mesh structure is more prone to stretching and cracking under stress compared to paper tape. It relies heavily on the joint compound for its strength.
- Not Ideal for Internal Corners: Its rigidity and lack of a central crease make it difficult to fold neatly into internal corners, often leading to rounded or uneven finishes.
- Cost: Generally more expensive per roll than paper tape.
- Requires Setting-Type Compound: For optimal results and crack resistance, mesh tape should ideally be used with a setting-type (quick-drying) joint compound, which cures harder than all-purpose compounds.
- Best Applications: Plasterboard repairs (small holes, cracks), flat joints where ease of application is prioritised, and curved surfaces.
For long-term durability and a high-quality finish, professional plasterers often prefer paper tape due to its superior crack resistance, especially on flat joints and internal corners. It’s an investment in the longevity of your walls.
Comparison Table
To help you quickly decide, here’s a head-to-head comparison of paper tape and fibreglass mesh tape across key factors:
| Feature | Paper Drywall Tape | Fibreglass Mesh Tape |
|---|---|---|
| Crack Resistance | Excellent (high tensile strength) | Good (relies on compound strength) |
| Ease of Use | Requires skill, prone to bubbles/wrinkles | Easy (self-adhesive) |
| Joint Strength | Very strong, monolithic bond with mud | Relies heavily on compound; can stretch |
| Cost | Generally more affordable | Generally more expensive |
| Internal Corners | Excellent (creased for sharp corners) | Poor (rigid, difficult to fold cleanly) |
| Wet Area Suitability | Good (with setting compound) | Acceptable (fibreglass resists mould, but less structural integrity) |
| Recommended Compound | All-purpose or setting-type | Setting-type for best results |
| Application Process | Embed in wet mud, then smooth | Stick to dry board, then mud over |
Choosing the Right Drywall Tape?
Get tailored advice to ensure your plasterboard project starts right and avoids costly rework. Our experienced plasterers can answer your questions, helping you select the ideal tape for lasting results.
Choosing the Right Drywall Tape for Your Project
The best drywall tape for your project isn’t a one-size-fits-all answer; it depends on the specific joint type, the environment, and your skill level. Empire Interior Plastering always considers these factors to ensure a durable, long-lasting finish.
Which Tape Suits Which Joint Type?
- Flat Tapered-Edge Joints: These are the most common joints where two plasterboard sheets meet with a slight bevel.
- Paper Tape: Highly recommended. Its strength provides excellent crack resistance over the long, flat span.
- Mesh Tape: Acceptable, especially for DIYers, but ensure it’s embedded in a strong setting-type compound for better durability.
- Internal Corners: Where two walls meet, forming an inside corner.
- Paper Tape: The clear winner. Its pre-creased design allows for a sharp, clean fold, ensuring a crisp corner that resists cracking.
- Mesh Tape: Not recommended. It’s difficult to fold neatly and tends to create rounded, less durable corners.
- Butt Joints: Where the non-tapered ends of plasterboard sheets meet. These are harder to finish smoothly as they create a slight hump.
- Paper Tape: Preferred. Its rigidity helps bridge the gap and provides superior crack resistance in these high-stress areas. Requires careful feathering of compound.
- Mesh Tape: Less ideal. While easier to apply, its tendency to stretch can lead to cracks in butt joints over time if not perfectly embedded.
- Plasterboard Repairs: Patching holes or fixing existing cracks.
- Mesh Tape: Excellent choice. Its self-adhesive nature makes it quick and easy to apply for immediate reinforcement. Ideal for seamless wall repairs.
- Paper Tape: Can be used, but is more cumbersome for small patches due to the need for wet mud embedment.
Wet Area Considerations (Bathrooms, Laundries)
For high-humidity environments like bathrooms, laundries, and other wet areas, moisture resistance and long-term durability are paramount. Standards Australia and the National Construction Code (NCC) outline specific requirements for these spaces.
- Paper Tape: When used with a setting-type (quick-drying) joint compound, paper tape offers a robust, moisture-resistant finish. The setting compound cures harder and provides a stronger barrier against moisture penetration than traditional drying compounds. This combination is generally preferred by professionals for wet areas.
- Mesh Tape: While fibreglass itself is mould-resistant, the open weave of mesh tape means it relies entirely on the joint compound for its structural integrity and moisture barrier. If using mesh tape in wet areas, it is absolutely essential to pair it with a high-quality setting-type compound to maximise durability. However, it still offers less inherent strength than properly applied paper tape.
For critical wet areas, experienced plasterers from Empire Interior Plastering often recommend specific wet area plasterboard products and paper tape for maximum peace of mind and compliance.
Common Taping Mistakes and How to Avoid Them
Even with the right drywall tape for plasterboard joints, poor application can compromise the finish. Here are common mistakes:
- Insufficient Mud: Not enough joint compound under paper tape leads to bubbles and weak bonds. Ensure a generous, even layer.
- Too Much Mud: Over-applying compound, especially with mesh tape, can create humps that are difficult to sand flush.
- Bubbles/Wrinkles in Paper Tape: Caused by uneven mud or not properly smoothing the tape. Always smooth with a taping knife from the centre outwards.
- Overlapping Mesh Tape: Each strip of mesh tape should meet edge-to-edge, not overlap, to avoid creating raised areas.
- Not Using Setting Compound with Mesh: Standard drying compounds may not provide enough strength for mesh tape, leading to cracks.
- Poorly Cleaned Joints: Dust or debris in the joint prevents proper adhesion. Always clean joints thoroughly before taping.
When to Use Each Tape Type or Both
Many professional projects, especially new home plastering or extensive renovations, benefit from a combined approach:
- Paper Tape for Corners and Flat Joints: Utilise paper tape for all internal corners and critical flat joints (especially butt joints) where maximum crack resistance is desired.
- Mesh Tape for Repairs and Minor Flat Joints: Keep mesh tape handy for quick repairs, small patches, or less critical flat joints where speed and ease of application are a priority.
This hybrid strategy leverages the strengths of both materials, ensuring optimal results across different areas of a project. For a comprehensive guide to ensuring quality in new builds, consult our new home plastering checklist.
DIY Taping vs Hiring a Professional Plasterer
Knowing when to pick up the taping knife yourself and when to call in a qualified plasterer can save you significant time, money, and frustration. The decision ultimately comes down to the scope of the work, the joint types involved, and how visible the finished surface will be.
When DIY taping is reasonable:
- Small patch repairs: Fixing a single hole or hairline crack with self-adhesive mesh tape and a pre-mixed compound is a manageable weekend task. The area is small enough that minor imperfections can be sanded back without affecting the broader wall.
- Low-visibility areas: Joints inside a garage, storage room, or behind built-in cabinetry don’t demand a flawless Level 5 finish. Mesh tape and an all-purpose compound will get the job done.
- Single flat joints on tapered edges: If you have one or two tapered-edge joins to tape — for example, after replacing a damaged sheet — and you’re comfortable using a 200 mm taping knife, the tapered recess gives you room to feather the compound without creating a visible ridge.
When professional taping is worth the investment:
- Butt joints and ceiling work: Butt joints are unforgiving — even a slight ridge or crack is visible under raking light. Ceiling joints are worse because overhead work magnifies every inconsistency. Professional plasterers use specialised techniques such as back-blocking and wide feathering (sometimes 600 mm or more) to produce a flat, invisible result that DIY application rarely achieves first time.
- Internal corners throughout a room: Paper tape folded into a corner needs to sit perfectly straight across the full length of the wall. A single wrinkle or air pocket creates a visible line that’s difficult to fix once the compound has set. Across an entire room or house, the cumulative skill required makes this a job best left to experienced hands.
- Wet areas (bathrooms, laundries, kitchens): These spaces need paper tape bedded in setting-type compound to meet NCC requirements for moisture resistance. Incorrect taping in a wet area can lead to compound breakdown, mould growth behind the surface, and costly remediation work down the track.
- Full-room or whole-house projects: Taping, mudding, and sanding an entire house involves hundreds of linear metres of joints. The time commitment alone — typically three separate coats with drying time between each — often makes professional plastering more cost-effective than the lost weekends a DIY approach demands.
- Projects requiring a premium paint finish: If the walls will be painted in a satin, semi-gloss, or gloss finish, every joint imperfection becomes visible. A professional plasterer can deliver a Level 4 or Level 5 finish that stands up to critical lighting and high-sheen coatings.
A common and costly DIY mistake is underestimating the difficulty of paper tape application. Poorly embedded tape that bubbles, wrinkles, or delaminates often has to be stripped off and redone — doubling the material cost and tripling the labour. If you’re unsure, starting with a small, low-visibility area is a sensible way to test your skills before committing to a larger project.
Frequently Asked Questions
Can I use mesh tape on internal corners?
While technically possible, it’s generally not recommended. Mesh tape’s rigidity makes it difficult to fold neatly into internal corners, often resulting in rounded or uneven finishes that are prone to cracking. Paper tape, with its pre-creased design, is far superior for achieving crisp, durable internal corners.
Do I need special joint compound for mesh tape?
For optimal results and crack resistance, fibreglass mesh tape should ideally be used with a setting-type (quick-drying) joint compound. Setting compounds cure harder and provide more structural integrity, which is crucial as mesh tape relies heavily on the compound for its strength. All-purpose drying compounds can be used but are more prone to cracking over time because they shrink as they dry rather than curing through a chemical reaction.
What happens if I don’t use drywall tape?
If you don’t use drywall tape, the joint compound applied to the plasterboard seams will almost certainly crack over time. This is due to natural movement in the building, temperature fluctuations, and humidity changes. Tape provides the necessary reinforcement to create a strong, stable, and crack-resistant joint.
When should I consider professional plastering services?
Hiring professionals like Empire Interior Plastering is highly recommended for new builds, large-scale renovations, complex architectural features, wet areas (bathrooms and laundries), ceiling work, or if you’re aiming for a premium, long-lasting finish under satin or gloss paint. Our 30+ years of experience help deliver precise application, strong crack resistance, and a quality surface crafted to meet Australian Standards. This is particularly valuable for plastering in Picton and surrounding Sydney areas, delivering a durable, high-quality finish. For smaller repairs in low-visibility areas, a confident DIYer with mesh tape and pre-mixed compound can achieve a serviceable finish.
Can I mix paper and mesh tape on the same project?
Yes, combining both types of tape is a common and effective strategy. Many professionals use paper tape for critical areas like internal corners and butt joints where its superior strength is needed, and mesh tape for repairs or less critical flat joints where ease of application is beneficial. This approach leverages the strengths of each material.
Conclusion
Choosing the right drywall tape for plasterboard joints is more than just a minor detail; it’s a fundamental step in ensuring the longevity and aesthetic appeal of your plasterboard finish. While fibreglass mesh tape offers ease of use for quick repairs, paper tape remains the professional’s choice for its superior strength and crack resistance, especially in critical areas like internal corners and butt joints. Understanding these differences allows you to make an informed decision, whether you’re tackling a DIY project or entrusting your walls to experts.
For lasting results, the precision and experience of professional plasterers are invaluable. Empire Interior Plastering brings over 30 years of expertise to every project, helping prepare your walls and ceilings for a beautiful, long-lasting paint finish. Learn more about painting after plastering and achieve the quality interior you envision.
Related services
Ready for Professional Plastering Results?
A free, no-obligation quote from Empire Interior Plastering gives you a clear picture of what professional plasterboard taping involves for your specific project. With over 30 years of hands-on experience, our team delivers durable, precision joints across Sydney.