
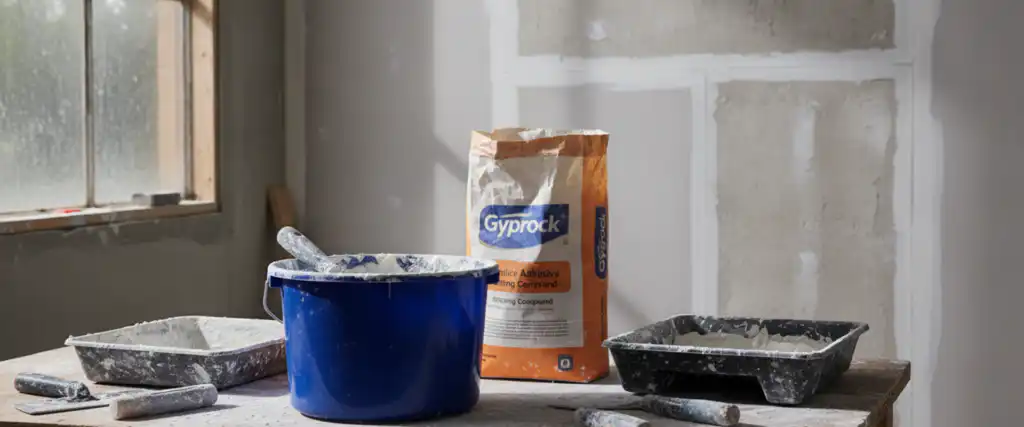
When tackling plasterboard projects, whether it’s a new build, a renovation, or a simple wall patch-up, the choice of drywall compound is critical for achieving a smooth, durable, and paint-ready finish. In Australia, we commonly refer to plasterboard as Gyprock (a leading brand name, much like Kleenex for tissues), and the compounds used to finish it are often called jointing compounds or simply “mud.” Selecting the right type for each stage of your project can significantly impact the final quality and longevity of your walls and ceilings.
Key Takeaways
- Jointing compound (often called “mud”) is essential for seamless plasterboard finishes, covering joints, fasteners, and imperfections.
- The four main types are base coat, topping, all-purpose, and setting compound, each suited for different stages and applications.
- Premixed compounds offer convenience and ease of sanding, while setting compounds provide superior strength and faster drying for thicker applications.
- Incorrect compound selection can lead to issues like cracking, bubbling, visible joints, and poor paint adhesion.
- For complex installations or extensive repairs, professional plastering ensures a high-quality, compliant, and long-lasting finish.
What Is Jointing Compound and What Does It Do?
Jointing compound is a paste or powder specifically formulated to conceal the seams where individual plasterboard sheets meet. When plasterboard is fixed to wall frames or ceiling joists, every sheet edge, screw head, and corner creates a visible line or indent. Jointing compound fills and bridges these gaps, embedding reinforcing tape over flat joints and covering fastener dimples so the finished wall looks and feels like a single, unbroken surface.
Beyond simple gap-filling, jointing compound serves several structural and aesthetic functions in a plasterboard installation:
- Joint reinforcement: It bonds paper or fibreglass tape over butt joints and recessed edges, preventing cracks from developing as the building settles or timber framing expands and contracts with seasonal moisture changes.
- Fastener concealment: Every screw or nail used to fix plasterboard must sit slightly below the paper surface. Compound fills these dimples flush, leaving no trace of the fixing beneath.
- Corner finishing: Internal corners and external corner beads both require compound to create clean, straight edges.
- Surface preparation for paint: The final layer of compound creates a uniformly smooth, consistent surface that accepts primer and paint evenly — without it, differences in porosity between bare paper and filled areas would show through the paint as visible banding or sheen variation.
In short, jointing compound is what turns a framework of individual plasterboard sheets into walls and ceilings that look seamless, perform structurally, and hold paint beautifully.
Drywall Compound Types Explained
Understanding the specific properties of each jointing compound type is the first step to making an informed choice for your project.
Base Coat Compound
Base coat compound is designed for the initial stages of plasterboard finishing. It’s typically a gypsum-based powder that is mixed with water, making it a setting compound. Its key characteristics include:
- Strong Adhesion: Excellent for embedding drywall tape for plasterboard joints securely over joints.
- Hard-Setting: Dries hard and strong, providing structural integrity to the joint.
- Minimal Shrinkage: Formulated to minimise shrinkage, reducing the likelihood of cracks in deeper fills.
- Fast Drying: Available in various setting times (e.g., 20, 45, 90 minutes), allowing for quicker progression between coats.
This compound is crucial for the initial layer over tape and for filling larger gaps or imperfections.
Topping Compound
Topping compound is specifically formulated for the final coats of plasterboard finishing. Unlike base coat, it’s typically a premixed compound, though powder versions exist. Its main features are:
- Smooth Finish: Designed to achieve an ultra-smooth, fine surface.
- Easy Sanding: Sands much more easily than base coat, allowing for a perfectly feathered edge and seamless transitions.
- Low Porosity: Provides an even, less porous surface, which is ideal for painting after plastering, preventing paint flashing or banding.
Topping compound is applied in thin layers to create the final, flawless surface ready for primer and paint.
All-Purpose Compound
As the name suggests, all-purpose compound (sometimes referred to as universal compound) aims to combine the properties of both base and topping coats. It’s generally a premixed product and offers:
- Versatility: Can be used for embedding tape, filling, and finishing.
- Convenience: Reduces the need for multiple products on smaller jobs.
- Moderate Strength and Sandability: Offers a balance between the hardness of a base coat and the easy sanding of a topping coat.
While convenient for minor wall patch-up repairs or small DIY projects, professional plasterers often prefer dedicated base and topping compounds for larger jobs to achieve optimal results.
Setting Compound (Powder Form)
Setting compounds are typically gypsum-based powders mixed with water, available in various setting times (e.g., Gyprock CSR’s Base Coat 45 or 60). Their main advantages are:
- Chemical Set: They cure through a chemical reaction, not just evaporation, making them ideal for thicker applications without excessive shrinkage.
- High Strength: Once set, they are very hard and durable.
- Fast Turnaround: Quick setting times allow for multiple coats in a single day, speeding up project completion.
- Ideal for Deep Fills: Excellent for filling large gaps, repairing severe damage, or building up layers quickly.
Setting compounds are essential for professional applications where speed, strength, and minimal shrinkage are paramount.
Premixed vs. Setting Compound: Understanding the Trade-offs
The choice between premixed (ready-to-use) and setting (powder) compounds is one of the most fundamental decisions in plasterboard finishing. Both have distinct advantages and disadvantages.
Premixed Compounds
These come ready to use in tubs, eliminating the need for mixing water. They are typically acrylic-based or a blend of gypsum and polymers.
Advantages:
- Convenience: No mixing required, saving time and reducing mess.
- Longer Open Time: Stays workable for longer, making it forgiving for DIYers.
- Easier Sanding: Generally softer and easier to sand to a smooth finish, especially topping compounds.
Disadvantages:
- Drying Time: Dries solely by water evaporation, meaning thicker coats take significantly longer to cure.
- Shrinkage: Prone to more shrinkage as water evaporates, which can lead to hairline cracks if applied too thickly.
- Lower Strength: Not as hard or durable as setting compounds, making them less suitable for high-impact areas or structural repairs.
Setting Compounds (Powder)
These are gypsum-based powders that require mixing with water immediately before use. They cure through a chemical reaction.
Advantages:
- Fast Setting: Cures quickly (e.g., 20, 45, 90 minutes), allowing for rapid application of subsequent coats.
- High Strength: Forms a very hard, durable surface once cured, ideal for structural integrity.
- Minimal Shrinkage: Excellent for deep fills and embedding tape, as they shrink very little.
- Versatility: Different setting times allow professionals to tailor the product to the job’s pace.
Disadvantages:
- Mixing Required: Needs precise water-to-powder ratios; incorrect mixing can lead to poor performance.
- Limited Working Time: Once mixed, it sets quickly, requiring faster application and cleanup.
- Harder to Sand: Much harder to sand than premixed compounds, demanding more effort and precision during application.
The choice between premixed and setting compounds often comes down to balancing convenience with performance. For professional results on larger projects, the strength and speed of setting compounds are usually preferred, followed by the smooth finish of a premixed topping compound.
Which Compound for Which Job?
Matching the right compound to the specific task is crucial for optimal results.
Taping and Embedding
For embedding the drywall tape over plasterboard joints, a strong, low-shrinkage compound is essential.
- Best Choice: Base coat setting compound (powder). Its strong adhesion and minimal shrinkage ensure the tape is securely bonded and the joint remains stable.
- Alternative: All-purpose premixed compound can be used for smaller, less critical joints, but may not offer the same long-term stability.
Filling and Building Up Layers
When filling gaps, covering screws, or building up layers to level a surface, you need a compound that dries hard and resists cracking.
- Best Choice: Base coat setting compound (powder). Its fast setting time and strength make it ideal for multiple, thicker applications.
- Alternative: All-purpose premixed compound can work for thinner fills, but deep fills will take longer to dry and may shrink more.
Final Top Coats and Skim Coating
The final layers require a compound that sands easily to a smooth, paint-ready surface.
- Best Choice: Topping compound (premixed). Its fine consistency and easy sandability are perfect for creating a flawless finish.
- Alternative: All-purpose premixed compound can be used, but may require more sanding effort to achieve the same level of smoothness.
Patching and Repairs
For wall patch-up repairs, the choice depends on the size and depth of the damage.
- Small Holes/Cracks: All-purpose premixed compound is often sufficient for minor surface imperfections.
- Deep Holes/Extensive Damage: Use a base coat setting compound for the initial fill to ensure strength and minimal shrinkage, followed by a topping compound for the final smooth layers.
Specialty Applications
Wet Areas (Bathrooms, Laundries, Kitchens)
In wet areas, standard jointing compound can absorb ambient moisture over time, softening and eventually failing. While wet-area plasterboard (the green- or blue-faced moisture-resistant sheeting) handles the board itself, the joints are equally vulnerable if finished with a standard compound that isn’t designed for prolonged humidity exposure.
- What to use: A purpose-made moisture-resistant jointing compound, such as Gyprock’s Wet Area Base Coat or CSR’s wet-area-rated options. These compounds contain additives that resist moisture absorption once cured.
- Key requirement: The entire joint system — board, tape, compound, and sealant — must be rated for wet-area use. Using moisture-resistant board with standard compound defeats the purpose, because the joint becomes the weak point where moisture penetrates.
- Compliance note: The Building Code of Australia (BCA/NCC) and AS 3740 set out waterproofing requirements for wet areas. Jointing in zones behind showers, above baths, and in laundry splashback areas must be part of a compliant wet-area system. Always check the manufacturer’s technical data sheet to confirm the compound is rated for the specific wet-area zone.
Fire-Rated Walls and Ceilings
Fire-rated plasterboard systems — commonly required in unit boundaries, stairwells, garages adjoining living areas, and commercial builds — achieve their fire resistance level (FRL) as a tested assembly: specific board, specific framing, specific compound, and specific tape used together. Substituting any component, including the jointing compound, can void the system’s rated performance.
- What to use: The exact compound specified in the manufacturer’s tested fire-rated system. For example, Gyprock’s fire-rated systems specify their own base coat and finishing compounds; CSR Cemintel systems do the same. These compounds are formulated to maintain joint integrity at high temperatures rather than calcining and crumbling.
- Key requirement: Fire-rated systems are tested and listed to AS/NZS 1530.4 and must comply with the NCC. The FRL rating applies to the complete assembly as tested — not to individual components. Using a non-specified compound means the wall is no longer the tested system, and in the event of an inspection or a fire, it may be deemed non-compliant.
- Practical tip: Always keep a copy of the manufacturer’s system specification sheet on site. Certifiers and building inspectors will ask for evidence that the correct materials were used throughout.
Looking for expert advice on your plastering project?
Our 30+ years of experience ensures you get the right solutions for a flawless finish. Speak with our team about your specific needs.
Common Compound-Selection Mistakes and How to Avoid Them
Choosing the wrong drywall compound can lead to frustrating and visible imperfections. Here are some common mistakes and how to prevent them:
Using Topping Compound for Taping or Deep Fills
Topping compound lacks the adhesive strength and low shrinkage required for embedding tape or filling large voids. It will likely crack, bubble, or fail to bond properly, leading to visible joints and unstable repairs.
Fix: Always use a base coat setting compound for the initial tape embedding and for any substantial filling work.
Applying Premixed Compound Too Thickly
Premixed compounds shrink as water evaporates. When applied too thickly or used where a setting compound would be more appropriate — such as deep fills or tape embedding — that shrinkage can produce hairline cracks. This problem is especially noticeable when trying to rush drying by over-ventilating or heating.
Fix: Apply premixed compounds in thin, even layers, allowing each coat to dry thoroughly before applying the next. For deep fills, opt for a setting compound.
Using Hard-Setting Compound for the Final Coat
While setting compounds offer strength, they are notoriously difficult to sand smooth. If a hard-setting compound is used as the topmost layer, achieving a perfectly smooth, feathered edge becomes extremely difficult. Tool marks, ridges, and slight undulations that feel smooth to the touch become glaringly visible under “raking light” — the low-angle light cast by downlights, pendant lighting, or natural light skimming the surface.
Fix: Reserve topping compound for the final one or two coats to ensure easy sanding and a truly flawless finish. This directly impacts the plasterboard finish levels achieved.
Inconsistent Surface Porosity Leading to Paint Flashing
Plasterboard face paper, base coat compound, and topping compound each have distinct porosity levels. When the topmost layer isn’t a consistent, low-porosity finish — as a proper topping compound provides — the wall absorbs paint unevenly. This creates “flashing” or “banding”: visible differences in sheen or colour that become apparent after painting, especially with darker or glossier paints.
Fix: Ensure the final coat is always a dedicated topping compound, applied evenly and sanded smooth. Always prime the entire plasterboard surface with a high-quality plasterboard primer before applying paint to create a uniform absorption rate.
Ignoring Australian Product Availability and Standards
While general principles of drywall finishing are universal, specific product formulations, brands (like Gyprock and CSR), and compliance standards (such as AS/NZS 2589) vary by region. Using products not designed for Australian conditions or failing to adhere to local building codes can lead to sub-par results and potential compliance issues.
Fix: Always source reputable Australian brands and ensure the chosen compounds meet relevant Australian standards for strength, fire rating, or wet area applications. Consult manufacturer data sheets for specific product recommendations.
DIY or Professional? How to Decide
Not every plastering job requires a tradesperson, but not every job is suitable for a weekend DIYer either. Here’s how to gauge where your project falls.
When DIY Is Reasonable
- Small patch repairs: Filling a single nail hole, a minor dent, or a crack shorter than about 300 mm is well within reach using all-purpose premixed compound, a small taping knife, and a sanding block.
- Re-coating a previously finished surface: If a small area has been damaged and the original tape is still bonded and intact, applying a thin skim of topping compound and sanding smooth is manageable with patience and basic tools.
- Low-visibility areas: Inside a wardrobe, behind furniture, or in a garage — areas where a Level 3 or 4 finish is acceptable rather than a flawless Level 5 — are forgiving environments to practise in.
When You Should Call a Professional
- Full-room or whole-house installations: Taping and finishing an entire room’s worth of joints demands consistent technique across dozens of linear metres. Inconsistencies compound as you go and become painfully visible under raking light once painted.
- Ceilings: Overhead work is physically demanding and technically unforgiving — compound sags under gravity, and imperfections on ceilings are the most visible surfaces in any room because light strikes them at shallow angles all day.
- Fire-rated or wet-area systems: As outlined above, these require specific tested products and installation methods. Incorrect work can void compliance, and a certifier or inspector can require you to strip and redo the entire system.
- High-quality paint finishes: If the walls will receive a satin, semi-gloss, or dark-coloured finish, every minor ridge and hollow will show. Achieving a Level 5 finish (skim coat over the entire surface) is specialist work that demands both the right compound sequence and significant experience.
- Bulkheads, curved walls, and complex geometry: Compound work around curves, stepped ceilings, and shadow-line details requires custom techniques that go beyond standard flat-wall finishing.
A Practical Self-Assessment
Ask yourself three questions before committing to DIY:
- Do I have the tools? At a minimum you need a hawk, a 150 mm and 250 mm taping knife, a corner tool, a sanding pole, and a mixing drill if using setting compounds. If you’d need to buy everything from scratch, the cost often approaches what a professional would charge for a small job.
- Can I accept imperfection? First-time plastering rarely produces a tradesperson-quality finish. If the area is prominent — an open-plan living room, a hallway lit by downlights — visible imperfections will be a lasting reminder.
- Is compliance involved? Any work that requires a building certifier’s sign-off (fire-rated walls, wet areas, new builds under the NCC) should be done by a licensed professional who can provide documentation of the materials and methods used.
Frequently Asked Questions
Can I use all-purpose compound for an entire plastering job?
While all-purpose compound is versatile, for professional-grade results on larger projects like new home plastering checklist installations or extensive renovations, it’s generally recommended to use dedicated base coat setting compound for taping and filling, followed by a topping compound for the final smooth coats. All-purpose is best suited for small repairs or minor DIY tasks.
What is the main difference between premixed and setting compounds?
Premixed compounds dry by water evaporation, offering longer working times and easier sanding, but with more shrinkage and longer drying times for thick applications. Setting compounds (powder) cure through a chemical reaction, providing faster setting times, higher strength, and minimal shrinkage, making them ideal for deeper fills and embedding tape, though they are harder to sand.
How does compound choice affect the final paint finish?
The choice of compound directly impacts the final paint finish. Using a topping compound for the final coats ensures a uniformly smooth, low-porosity surface that absorbs paint evenly, preventing issues like flashing or visible joint lines. If a harder, more porous compound is used for the final finish, paint can absorb unevenly, leading to an inconsistent appearance.
When should I hire a professional plasterer instead of DIY?
While minor patching can be a DIY task, larger projects like new plasterboard installations, ceiling bulkheads, or extensive home renovations often benefit from professional expertise. Empire Interior Plastering, with our 30+ years of experience and MBA membership, ensures precision, compliance, and a flawless finish that DIY efforts can rarely match. Professionals have the tools, skills, and knowledge to achieve perfect plasterboard finish levels efficiently.
Conclusion
Choosing the correct drywall compound is a foundational step toward achieving a professional-grade finish on any plasterboard project. By understanding the distinct properties of base coat, topping, all-purpose, and setting compounds, you can make informed decisions that prevent common mistakes and ensure a durable, smooth, and paint-ready surface.
For homeowners and builders across Sydney, navigating these choices can be complex. While DIY is an option for small jobs, entrusting your project to experienced professionals guarantees superior results. Empire Interior Plastering brings over 30 years of expertise to every job, delivering precision workmanship and flawless interior plastering services across Macarthur, South-West Sydney, and wider Sydney suburbs.
Related services
Visit Empire Interior Plastering Today
Ready to transform your interiors with exceptional plastering? Get a free, no-obligation quote tailored to your project needs. Our team is committed to delivering precision and lasting quality.