
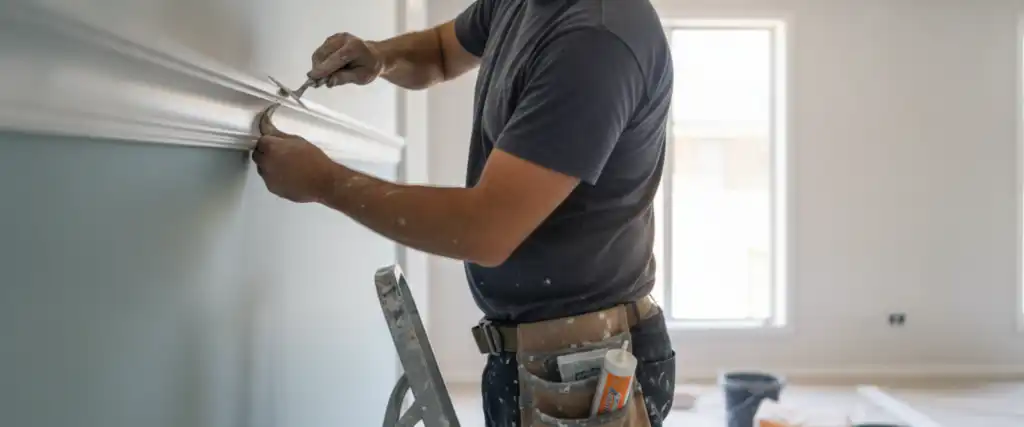
Achieving a polished look in your Sydney home often involves the elegant detail of plaster cornice installation. This architectural feature seamlessly bridges walls and ceilings, elevating a room’s aesthetic and offering superior durability compared to lighter alternatives like polystyrene. This article will guide Sydney homeowners through the professional process, from initial preparation and precise fitting to the crucial finishing steps, ensuring a flawless and lasting result.
Key Takeaways
- Professional plaster cornice installation involves careful room preparation, precise measuring and cutting, and expert fixing for a flawless, durable finish.
- Plaster cornice offers superior durability, fire resistance, and a premium aesthetic compared to lighter polystyrene alternatives.
- Proper room preparation, including clearing furniture and protecting surfaces, ensures a smooth and efficient installation process.
- Professional installers guarantee clean mitre joints, strong adhesion, and a smooth finish that is difficult to achieve with DIY methods.
- After installation, adequate curing time, followed by filling, sanding and painting, is crucial for a long-lasting and aesthetically pleasing result.
What Plaster Cornice Installation Involves
Plaster cornice installation is a meticulous process that transforms the junction between your walls and ceiling. It’s more than just attaching a decorative strip; it requires precision, skill, and an understanding of materials to achieve a seamless, long-lasting finish. Empire Interior Plastering, with over 30 years of experience, approaches each project with a focus on quality craftsmanship.
The process generally begins with a thorough assessment of the room and existing surfaces, ensuring they are clean, dry, and ready for installation. This attention to detail from the outset helps prevent issues down the line and ensures the cornice adheres correctly, creating clean lines and a professional look.
Plaster Cornice vs Polystyrene Cornice
When selecting cornice for your Sydney home, you’ll typically encounter two main materials: traditional plaster cornice and modern polystyrene cornice. Understanding their differences is crucial for making an informed decision that suits your aesthetic and functional needs.
Plaster Cornice: Made from gypsum plaster, this is the traditional choice known for its durability, strength, and classic aesthetic. Plaster cornice offers crisp, sharp lines and can withstand minor impacts better than polystyrene. It’s also fire-resistant, providing an added layer of safety. The weight and rigidity of set plaster contribute to a premium feel, making it ideal for heritage homes, high-end renovations, or any space where a superior finish is desired. While the initial cornice replacement cost in Sydney for plaster might be slightly higher, its longevity and aesthetic appeal often justify the investment.
Polystyrene Cornice: This lightweight alternative is made from expanded polystyrene. It’s easier and quicker to install, often making it a popular DIY choice due to its lower material cost and simpler cutting requirements. However, polystyrene cornice is less durable, more susceptible to dents and damage, and offers no fire resistance. Its appearance can also be less refined, with softer edges and a less substantial feel compared to plaster. For budget-conscious projects or temporary solutions, polystyrene can be an option, but for a truly lasting and elegant finish, plaster remains the superior choice.
Considering the Right Cornice for Your Home?
Talk to Sonny about your project. With 30 years of experience, he can guide you through the best options for durability and style.
How to Prepare Your Room
Proper room preparation is vital for any plastering project, especially for cornice installation. A well-prepared space ensures efficiency, protects your belongings, and contributes to a flawless finish. Here’s how you can prepare your room before the plasterer arrives:
- Clear the Room: Remove all furniture, décor, and wall hangings from the room. If large items cannot be moved, push them to the centre of the room and cover them thoroughly with dust sheets.
- Protect Surfaces: Lay down drop cloths or plastic sheeting across the entire floor area to protect against plaster dust and spills. Cover any built-in fixtures, light fittings, or windows that cannot be removed.
- Ensure Access: Clear pathways for the plasterers to move freely with materials and equipment, including ladders and workbenches. Ensure adequate lighting is available.
- Clean Walls and Ceilings: Dust and wipe down the wall and ceiling junctions where the cornice will be installed. Any loose debris can affect adhesion.
Taking these steps ensures our team can work efficiently and deliver the high-quality results Empire Interior Plastering is known for, without unnecessary delays or damage to your property. For broader renovation planning, consult our new home plastering checklist.
The Installation Process
Professional plaster cornice installation is a multi-step process demanding precision at every stage. Here’s a breakdown of what Empire Interior Plastering typically follows:
- Measuring and Marking: Accurate measurements are taken to determine the required lengths of cornice. Lines are often marked on the walls and ceilings to guide precise placement.
- Cutting and Mitring: Plaster cornice sections are cut to size using specialised tools. The most critical step here is cutting the internal and external mitre joints at the corners. Achieving a perfect, seamless mitre joint requires skill and experience to ensure the corners meet perfectly without gaps.
- Applying Adhesive: A strong cornice adhesive is applied to the back edges of the cornice. This ensures a secure bond to both the wall and ceiling surfaces. For heavier plaster cornice, additional mechanical fixings may also be used.
- Fixing the Cornice: Each section is carefully positioned and pressed firmly into place along the marked lines. Plasterers work section by section, ensuring each piece is level and flush.
- Filling and Finishing: Once the cornice is fixed, any small gaps at the joints or along the edges are filled with set plaster or jointing compound. This is meticulously smoothed to create a seamless transition, making the cornice appear as a continuous, integral part of the room.
Achieving a perfectly seamless cornice installation is about more than just applying plaster; it’s about the precision in every cut and the meticulous finishing that makes it look like it’s always been there. That’s the hallmark of true craftsmanship.
How Long Does Cornice Installation Take
The duration of cornice installation can vary based on several factors, including the size of the room, the complexity of the cornice profile, and the number of corners or architectural features. Generally, a standard-sized room with a simple cove cornice might take a day or two for a professional team. More intricate or multiple rooms will naturally extend the timeline.
Factors affecting the timeline:
- Room Size: Larger rooms require more lineal metres of cornice and more time for cutting and fixing.
- Cornice Profile: Simple profiles are quicker to install than complex, multi-layered decorative designs.
- Number of Corners: Each internal and external corner requires precise mitring, which is a time-consuming part of the process.
- Room Condition: Uneven walls or ceilings may require additional preparation or corrective work, adding to the overall time.
- Curing Time: After installation, the cornice adhesive and any applied set plaster need time to cure fully before sanding and painting can begin. This typically takes 24-48 hours, depending on humidity and ventilation.
Empire Interior Plastering provides clear timelines during the quoting process, ensuring you know what to expect for your specific project.
Professional Installation vs DIY
While DIY cornice installation might seem like a cost-saving option, the difference in finish quality between a professional job and a DIY attempt is often significant. Professional plasterers, like those at Empire Interior Plastering, bring years of experience and specialised tools to every job.
- Precision Mitring: Achieving perfect mitre joints at corners is incredibly difficult without extensive practice. Professionals ensure tight, seamless joins that are virtually invisible.
- Strong Adhesion: Experts use the correct cornice adhesive and fixing techniques for durable, long-lasting results, preventing future cracking or detachment.
- Clean Lines and Finish: Professional installers meticulously fill and sand all joints and imperfections, resulting in smooth, clean lines and a superior plasterboard finish levels that elevate the entire room.
- Efficiency: An experienced team can complete the job much faster and with less mess than a DIY enthusiast.
- Warranties and Insurance: Hiring a licensed and insured professional provides peace of mind, knowing your investment is protected. Empire Interior Plastering offers warranties and insurance for all our work.
The quality difference in mitring, adhesion, and overall finish makes professional installation the preferred choice for homeowners seeking a premium, durable result.
What to Ask When Getting a Cornice Quote
Getting the right quote is about more than comparing dollar figures. A thorough quote tells you exactly what you’re paying for and helps you spot the difference between a professional outfit and a corner-cutter. Here’s what to cover when a plasterer visits to assess your cornice job:
- Material and profile: Confirm whether the quote is for plaster or polystyrene cornice, and ask to see a sample or photo of the exact profile being quoted. A 90 mm cove looks quite different from a 150 mm decorative step — make sure you agree on the style and size in millimetres before work begins.
- Scope of work: Clarify whether the price includes removal of old cornice, surface preparation, supply of materials, installation, filling, sanding, and clean-up. Some quotes cover installation only, leaving finishing and painting to a separate trade.
- Timeline and access: Ask how many days the job will take, whether the team needs the room cleared completely, and how long you should wait before painting (curing time). A professional installer should provide this upfront.
- Licensing and insurance: Request the installer’s licence number and proof of public liability insurance. In NSW, plastering work above certain thresholds requires a licence — a reputable tradesperson will provide this without hesitation.
- Warranty details: Ask what guarantee covers the workmanship, how long it lasts, and what happens if a joint cracks or adhesion fails within the warranty period.
- Red flags to watch for: Be cautious of quotes that are vague on materials, don’t include a site visit, lump everything into a single line item, or pressure you to commit on the spot. A trustworthy plasterer will itemise the work and welcome your questions.
Empire Interior Plastering provides free, no-obligation quotes that detail every aspect of the job — materials, profile, timeline, preparation, and finishing — so you can compare with confidence. For an idea of typical pricing, see our cornice replacement cost guide.
After Installation — Finishing and Painting
Once the plaster cornice is installed, the work isn’t quite finished. Proper post-installation steps are crucial for durability and aesthetics:
- Curing Time: Allow the cornice adhesive and any set plaster used for filling to cure completely. This typically takes 24 to 48 hours, depending on the product used and environmental conditions. Rushing this step can lead to cracking or poor paint adhesion.
- Filling: Once the initial set has hardened, inspect all joints, mitre corners, and edges closely. Apply a thin layer of setting compound to any hairline gaps or minor imperfections that may have appeared during curing, then allow this fill coat to dry fully before moving on.
- Sanding: Once cured, gently sand any filled areas to achieve a perfectly smooth surface. This ensures the cornice blends seamlessly with the walls and ceiling.
- Priming: Apply a high-quality primer to the cornice. This seals the plaster, promotes better paint adhesion, and ensures an even, consistent colour.
- Painting: Finally, paint the cornice to match your desired aesthetic. For tips on achieving the best results, refer to our guide on painting after plastering.
These finishing steps, when executed correctly, ensure your new plaster cornice looks impeccable and stands the test of time.
Frequently Asked Questions
What questions should I ask when getting a cornice installation quote?
Key areas to cover include the materials used (plaster vs. polystyrene), the exact profile and size, whether the quote includes removal of old cornice and post-installation finishing, the estimated timeline, preparation requirements, and proof of licensing and insurance. See the detailed breakdown in our quoting section above. Empire Interior Plastering provides free, no-obligation quotes that cover all these details.
What are common cornice profiles?
Common cornice profiles include cove cornice (a simple concave curve), step cornice (a series of stepped angles), and various decorative or ornate designs. The choice often depends on the architectural style of your home and personal preference. For a deeper dive into style options, explore our decorative cornices and ornate ceilings guide.
Can you install cornice on uneven walls?
Yes, professionals can install cornice on slightly uneven walls, but it may require additional preparation. Empire Interior Plastering addresses surface imperfections to ensure the cornice sits flush and appears straight, even if the underlying wall or ceiling is not perfectly level. This is part of the precision craftsmanship we pride ourselves on.
How do I choose between plaster and polystyrene cornice?
Your choice depends on your priorities. Choose plaster for superior durability, fire resistance, crisp lines, and a premium, long-lasting aesthetic. Opt for polystyrene if budget and ease of DIY installation are primary concerns, accepting its limitations in durability and finish quality. We recommend discussing your needs with a professional to find the best fit for your Sydney home.
Conclusion
Plaster cornice installation is a significant enhancement to any interior, offering both aesthetic appeal and a lasting finish. From understanding the material differences to preparing your room and appreciating the intricacies of professional installation, a well-informed homeowner is better equipped to achieve outstanding results.
Empire Interior Plastering has been delivering precision plastering across Sydney for over 30 years. Our commitment as a Master Builders Association member ensures every project, from simple cove cornice to intricate decorative designs, meets the highest industry standards. For a glimpse of our dedication to quality, browse our plastering projects gallery.
Related services
- Home Theatre Fitouts
- Drywall Tape for Plasterboard Joints
- Plasterer Near Me
- Expert Plastering Services in Western Sydney | Residential & Commercial
- Expert Plastering Services in Inner West Sydney | Residential & Commercial
- Expert Plastering Services in Sutherland Shire | Residential & Commercial
- Expert Plastering Services in Eastern Suburbs Sydney | Residential & Commercial
- Painting and Plastering Cost in Sydney
Visit Empire Interior Plastering Today
Ready to enhance your Sydney home with expertly installed plaster cornice? Contact us for a free quote and discover the difference 30 years of precision craftsmanship makes.